Set up your trading wallet
Zero-approval onchain perpetual futures require a self-custodial wallet that interacts directly with the target blockchain. Unlike centralized exchanges, there is no customer support to reverse a failed transaction or recover a lost key. You must control the private keys and ensure the wallet is configured for the specific network the protocol uses.
Install a reputable self-custodial wallet extension or mobile app. Most onchain perp protocols operate on Ethereum Layer 2 networks or alternative L1s. Check the protocol’s documentation to confirm which chain is supported. Create a new account and write down the recovery phrase (seed phrase) immediately. Store it offline in a secure location. Never share this phrase with anyone or store it digitally.
Configure the wallet to connect to the correct network. If the protocol runs on Arbitrum, Optimism, Base, or another L2, add the network manually in your wallet settings using the correct RPC URL and Chain ID. Most wallets auto-detect popular chains, but verifying the network prevents sending funds to the wrong address. Import any necessary token standards (ERC-20) if the protocol uses a specific governance or reward token.
Fund the wallet with the native gas token and the collateral asset. If the protocol requires ETH on Arbitrum, send ETH from an exchange or bridge. Ensure the balance covers both the initial margin and the gas fees for multiple transactions. Test the setup with a small amount before depositing significant capital.
Deposit collateral into the vault
To open a zero-approval onchain perpetual futures position, you must first fund the protocol’s liquidity pool. This process involves transferring assets into a smart contract vault that acts as the counterparty to your trades. Unlike centralized exchanges where you deposit funds into a general account, onchain perps require precise interaction with specific contract addresses to ensure your collateral is recognized and available for margining.
Click "Connect Wallet" on the protocol’s official site and authorize your Web3 provider. This establishes the session without moving funds.

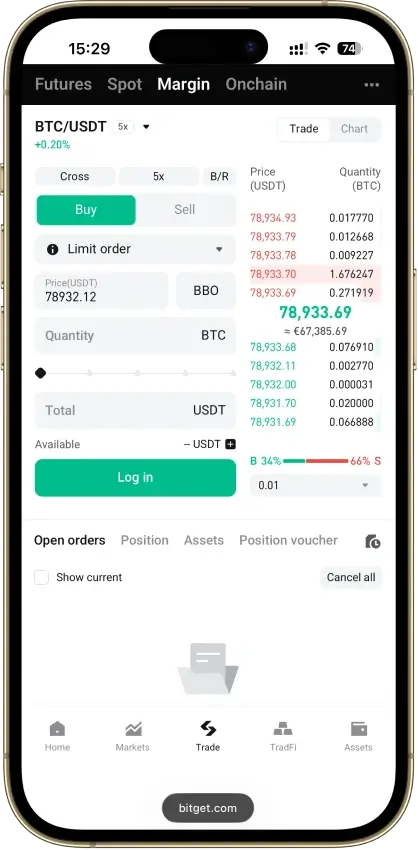
Locate the "Deposit" or "Vault" tab. Verify the active margin mode (isolated vs. cross) and supported collateral assets.
Select your collateral asset and input the amount. Check for minimum thresholds and note any network fees.
If required by the protocol’s zero-approval architecture, approve the smart contract’s allowance to pull funds. This is a one-time setup per asset.

Submit the transaction. Wait for confirmation, then check your vault balance to ensure funds are available for margining.
Configure cross-chain margin
Cross-chain margin lets you post collateral on one blockchain to open a perpetual futures position on another. This setup unlocks capital efficiency by allowing you to use assets like USDC on Ethereum L2s or SOL on Solana as collateral for a single unified margin account. Instead of bridging funds to the specific chain hosting the perp contract, you deposit once and trade across supported networks.
1. Select your margin asset and chain
Choose the blockchain where your collateral currently resides. Popular options include USDC on Arbitrum or Optimism and SOL on Solana. Ensure the asset is supported by the perp protocol's margin engine. For example, platforms like Margin Trade on Solayer accept native SVM assets as collateral [src-serp-2]. Verify that the protocol supports the specific chain you are using for posting margin.
2. Deposit collateral to the margin account
Navigate to the protocol's dashboard and connect your wallet. Locate the "Margin" or "Collateral" section and deposit your chosen assets into your cross-margin account. The funds remain on their native chain but are locked and tracked by the protocol's on-chain margin engine. This step creates the backing for your leverage.
3. Enable cross-margin mode
Switch your trading mode from "isolated" to "cross" or "cross-chain" margin. In isolated mode, only the funds directly allocated to a specific position are at risk. Cross-margin aggregates all your deposited collateral across chains to support open positions. This mode requires careful monitoring, as a liquidation event can draw from your entire margin balance [src-serp-7].
4. Open your position
Once your margin is active, select the desired perp contract (e.g., BTC/USD). The system will automatically calculate your available margin based on the cross-chain assets you posted. Enter your position size and leverage. The protocol will verify that your total collateral meets the initial margin requirements before executing the trade.
5. Monitor liquidation thresholds
Cross-chain positions are subject to the same liquidation mechanics as isolated ones, but with a larger pool of collateral. Keep an eye on your health factor, which reflects the ratio of your total cross-chain margin to your position size. If your health factor drops below the maintenance threshold, the protocol may liquidate your position to cover losses. Set price alerts to manage risk effectively.
Manage liquidation risks
Leverage amplifies gains, but it also accelerates losses. When the market moves against your position, your collateral is at risk. Understanding how maintenance margin works is the difference between holding a trade and facing a forced closure.
Understand maintenance margin thresholds
Two margin levels govern every leveraged perpetual futures position: initial margin and maintenance margin. Initial margin is the collateral required to open the trade. Maintenance margin is the minimum amount you must keep in your account to prevent liquidation.
If your account balance falls below the maintenance margin threshold, the protocol will liquidate your position. This usually happens by automatically closing the trade to protect the lending pool. The higher the leverage, the closer your liquidation price sits to the entry price, leaving less room for market volatility.
Warning: High leverage increases liquidation risk. Always check your liquidation price before opening a position.
Monitor positions actively
Zero-approval setups often rely on smart contracts that execute liquidations automatically. You cannot rely on manual intervention once a position is live. Set up price alerts for your liquidation price and monitor your health factor regularly.
Consider using isolated margin for high-risk trades. Isolated margin limits the amount of collateral at risk to the specific amount allocated to that position, protecting the rest of your portfolio. Cross margin uses your entire wallet balance as collateral, which can lead to total loss if not managed carefully.
Start with low leverage. Review your liquidation price before you open a trade to ensure it aligns with your risk tolerance. Remember, you cannot lose more than your deposited margin, but you can lose it entirely if the market moves sharply against you.
Learn more about margin types on MetaMask
Verify your position on-chain
Transparency is the only safety net in zero-approval trading. Because there is no customer support team to reverse mistakes or adjust leverage, you must independently confirm that your margin status matches your expectations. Relying on a third-party interface can be misleading if the UI lags or displays cached data.
Start by opening a block explorer for the network where your position lives, such as Etherscan for Ethereum or Solscan for Solana. Paste your wallet address into the search bar and filter by token transfers. Look for the exact amount of collateral you deposited and verify it matches the token standard specified by the protocol.
Next, navigate to the protocol’s official dashboard or smart contract address. Most on-chain perp platforms display real-time liquidation prices and current margin ratios directly on their interface. Cross-reference these numbers with the on-chain data. If the block explorer shows your collateral but the position does not appear in the contract’s active user list, the transaction may still be pending or failed.
This verification step takes seconds but prevents costly assumptions. Always trust the immutable ledger over the visual interface.
Onchain perp margin FAQ
What is the margin in perp trading?
Two margin thresholds govern every leveraged perpetual futures position: initial margin and maintenance margin. Initial margin is the collateral required to open a trade. The formula is straightforward: position size × mark price ÷ leverage. At 10x leverage, opening a $10,000 position requires $1,000 in initial margin [src-serp-1].
Is perp trading profitable?
Perps let traders speculate on price direction with leverage and the ability to profit from falling prices, but without ever holding the token. The trade-off is ongoing funding costs and the risk of losing all deposited collateral through liquidation [src-serp-2].
What is the difference between cross and isolated margin?
Cross margin pools all your available wallet balance to support open positions, which can delay liquidation but risks your entire account. Isolated margin assigns a fixed amount of collateral to each position, containing losses to that specific trade [src-serp-1].
What happens if I get liquidated?
Liquidation occurs when your margin balance falls below the maintenance threshold. The protocol automatically closes your position to cover the loss, and you lose the collateral allocated to that trade [src-serp-1].
No comments yet. Be the first to share your thoughts!